





Get answers, not
runaround.
Search setup guides, firmware fixes, and support resources by entering keywords below.
Step 1: Playback
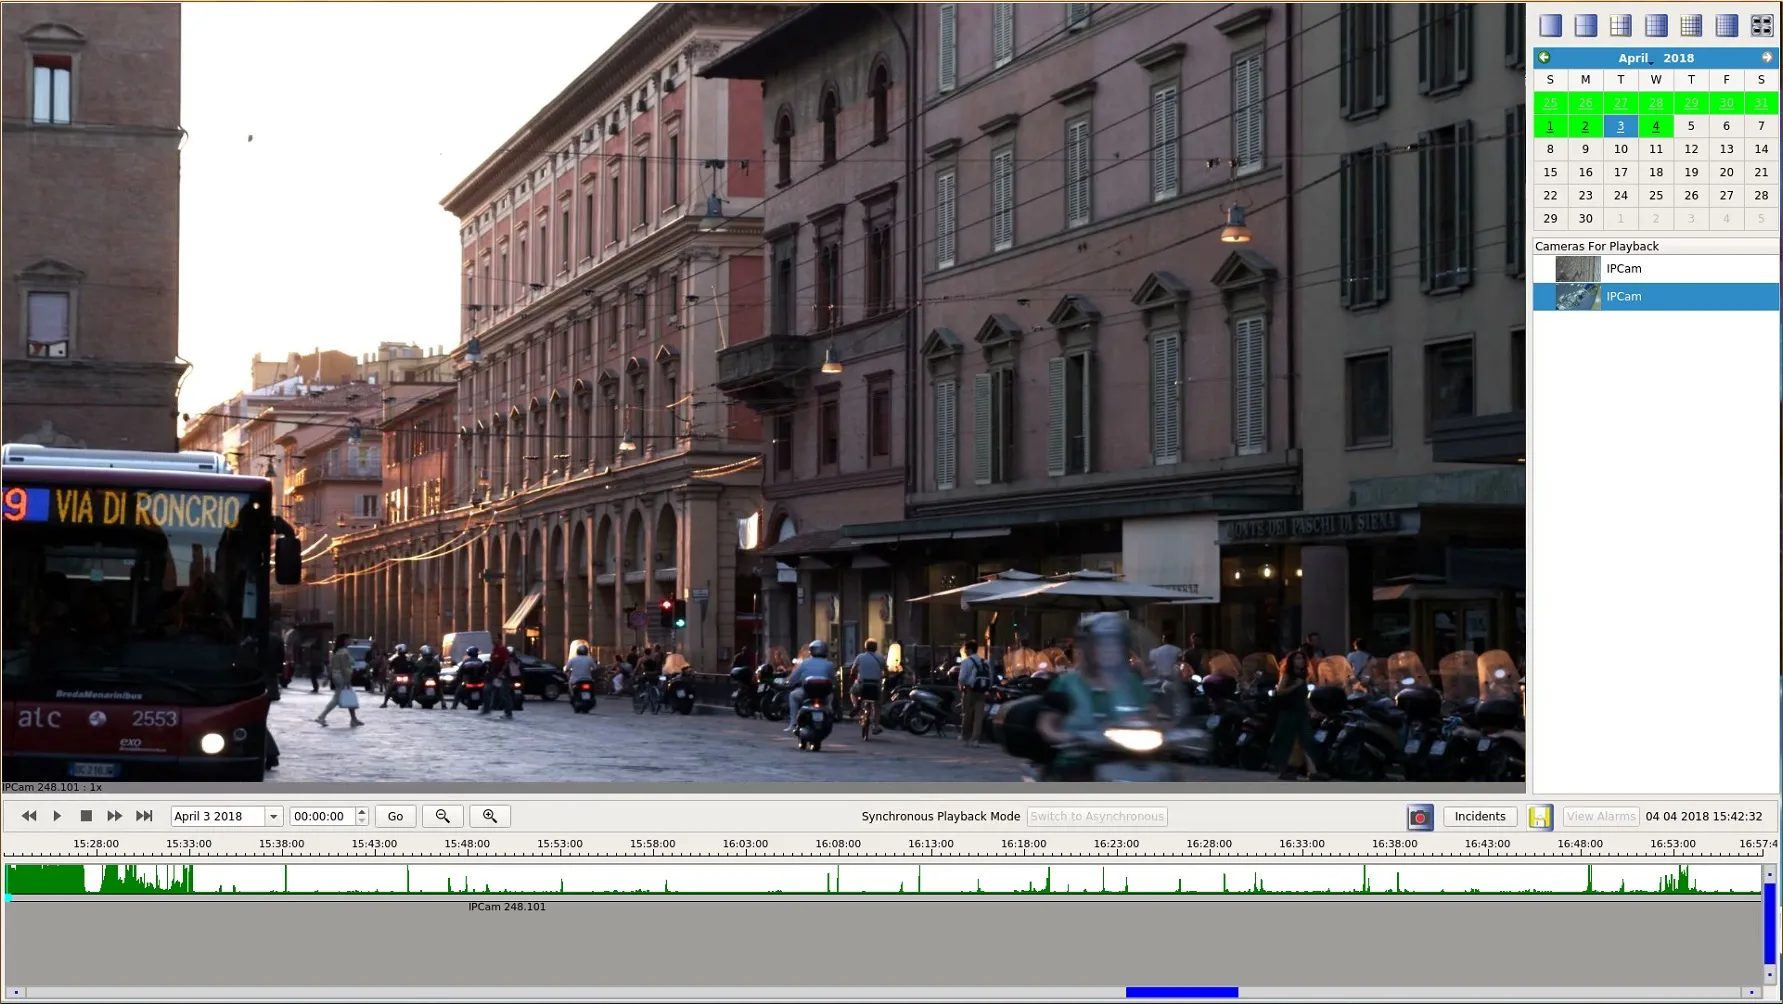
- Right click on your mouse and select Playback
- This will then take you to the playback screen.
- On the right-hand side is your option for playback where you can set the date, time and cameras you wish to view. By default, the unit will show you 1 camera. Drag the camera you wish to view into the empty window.
- You can view multiple cameras by changing the layout at the top right and dragging the additional cameras.
- You will then see your recorded footage start to play and you will see a timeline along the bottom of the screen.
- Normal recorded footage will show in green and motion recordings as a spike in the timeline. (Please refer to the motion detect guide on how to set this up) You can click anywhere on the timeline to view that point.
Step 2: Backup
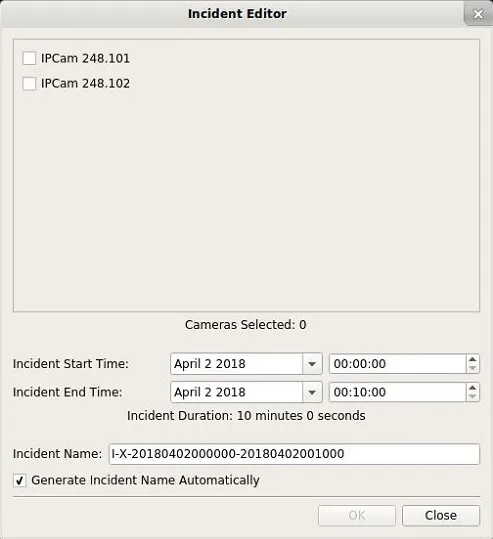
- On the playback screen select the option for Incidents.
- Select New to create a new Incident.
- You will then be asked to select what cameras you wish to save and the date and time they occurred.
- Once you have selected the right options, press OK.
- This will save your incident.
- You can repeat this for multiple events.
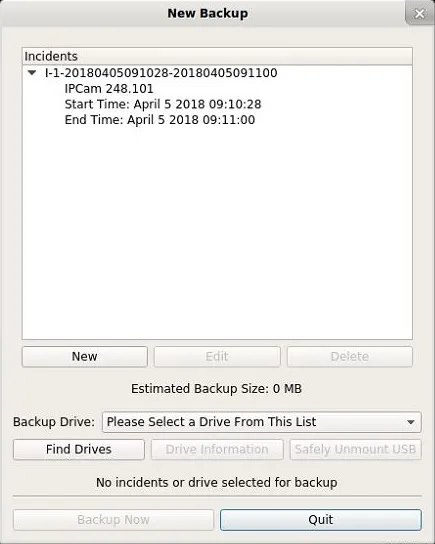
- Once you have added all the events you want to save, select the yellow save icon on the playback screen.
- Connect your USB device and select it as the Backup Drive.
- Select the incidents you wish to save and press Backup Now.
- This will save your incidents to the USB which can be viewed using a media player such as VLC or Windows Media Player.
Need Additional Help?
Our dedicated support desk is available to assist you 24/7.
Popular Articles
Frequently viewed documentation and technical guides.